
How to build cardboard robots
This fun and creative STEM robot workshop has worked so well, we decided to write it up so teachers and educators can bring it to their classrooms. This workshop teaches cardboard prototyping skills which the students then use to create app-controlled robots to compete in a BattleBots / Robot Wars type competition. It’s a great way to introduce students to learning through hands-on making and design iteration, and combines mechanical engineering, product design, electronics, robotics and computing to solve a well-defined problem with lots of room for creativity. This post covers how the activity fits within the UK and US curricula and then breaks the technical learning down into steps with detailed explanations and video clips that can be used in the classroom.
To help you run this yourself we are selling a Workshop Pack that includes 10 Smartibot kits (at a 27% discount) plus 20 plastic wheels.
Why a robot workshop?
We live in a digital-infused world, where design and technology play an increasingly important role in our both daily lives and in the wider world. In order to equip students with the essential skills to face the challenges in a complex future, it is important that they are exposed to similar technology-mediated environments and classroom experiences.
Some people believe that the realm of technology is separate from the world of hands-on making, and that computing can be treated as a separate subject to design. As people who design and make things with technology as our jobs, we could not disagree more with this perspective. We see technology and hands-on making as fundamentally intertwined in the problem-solving process.
We created this activity to allow kids to experience design through experimentation and iteration within a really fun and engaging problem space. Cardboard is a brilliant material for quickly working through ideas as physical prototypes, if you know how to work with it. It is used in some surprisingly ‘serious’ design and engineering contexts. For example, Dyson use it for most of the early stage prototyping of their new products like vacuum cleaners and hair dryers.
This activity teaches the key principles of successful cardboard modelling and then lets students loose to use those principles, along with Smartibot hardware and app, to create robots that compete in two fun and competitive challenges. To build a successful robot, students have to develop an understanding of stiffness, friction, torque, weight distribution and traction, plus *most importantly* development through iteration.
Key Stage 3 Design & Technology
This activity aligns extremely well with the UK Design and Technology Key Stage 3 National Curriculum, which emphasises the importance of designing through making and iteration:
“Through a variety of creative and practical activities, pupils should be taught the knowledge, understanding and skills needed to engage in an iterative process of designing and making”
It also covers all four elements of the ‘Technical Knowledge’ students are expected to demonstrate at Key Stage 3:
"To understand the properties of materials and the performance of structural elements to achieve functioning solutions
To understand how more advanced mechanical systems used in their products enable changes in movement and force
understand how more advanced electrical and electronic systems can be powered and
used in their products [for example, circuits with heat, light, sound and movement as
inputs and outputs]
To apply computing and use electronics to embed intelligence in products that respond to inputs [for example, sensors], and control outputs [for example, actuators], using programmable components [for example, microcontrollers]."
Educational Technology and STEM principles
These activities are not just the focus of curricula in the UK with the US Department for Education, where the first guiding principle for Advancing Educational Technology is to:
“Focus on the active use of technology to enable learning and teaching through creation, production, and problem-solving.”
Whilst the White House’s ‘Strategy for STEM education’ focuses on the active use of technology to enable learning through creation, production and problem-solving and emphasises project-based learning to promote innovation and the application of transdisciplinary knowledge, which requires learners to participate in the design and execution of their own ideas.
Activity Structure
Learning Objectives
- Developing creative, technical and practical confidence through making and designing
- Creating confidence in using specialist tools, techniques, processes and equipment
- Learning prototyping skills with cardboard
- Acquiring multidisciplinary knowledge from mathematics, science, engineering, computing and art and the ability to apply them
- Apply computing to embed intelligence and responsiveness in their design
Smartibot kit
4 AA batteries
Cardboard
Cutting mat
Craft knife
Glue gun and glue sticks
Ruler
Pencil
Wheels
Marbles
Elastic bands
iOS or Android Smartphone or tablet
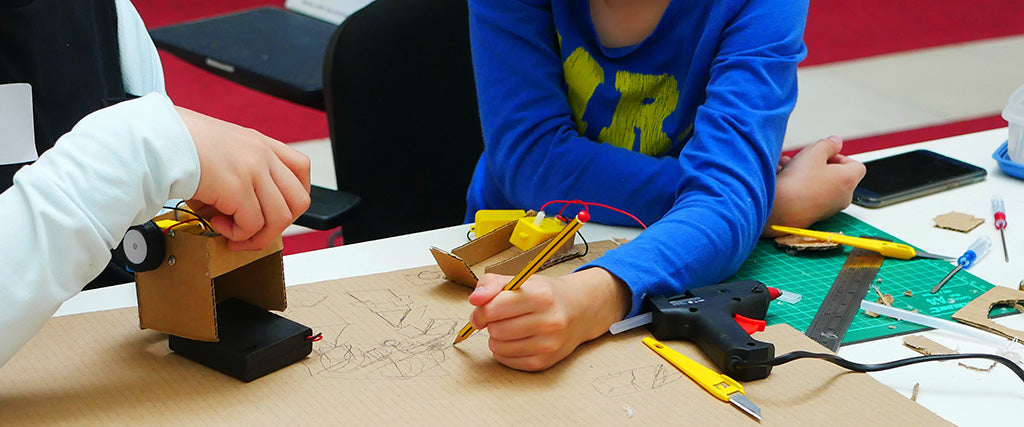
Introducing the activity
In this activity, we will be making a robot from cardboard. Cardboard is a great type of material to use for making virtually anything! Did you know that most engineers and designers first make a cardboard prototype to show people how the product will work and look. The reason? Cardboard is very cheap, sturdy, easy to use and recyclable.
Just like an engineer, you will use cardboard to build a robot in this activity, where you will learn all the tips and tricks you need to use different tools and materials. You will also learn several cutting techniques and engineering principles, and you will combine your knowledge with other disciplines, including mathematics, physics and computing.
The first section of the video shows robots other students have made in previous workshops, one in Shenzhen in China and one in Cambridge in the UK:
Step 1: Cutting cardboard (15 min)
Materials:
Cardboard
Ruler
Pencil
Cutting mat
Cutting knife
The first task in this session is to learn how to cut cardboard using a cutting mat, craft knife and ruler. Be careful: craft knives can be quite sharp!
Place the cardboard on the cutting mat and measure out 5 squares, that are each 8cm by 8cm. Then, use the craft knife to cut the squares out. A smart technique to do this is using multiple passes, and avoiding pushing the knife in too hard. This way, you won’t damage the cardboard and you will have straight, clean cuts.
This section of the video shows how to do this:
Step 2: Mount the circuit board and make holes for the motors (15 min)
Materials:
3 squares of cardboard
Screwdriver
Smartibot circuit board
2 Smartibot motors
Four sets of nuts and bolts
Craft knife
Cutting mat
The next step is to mount the circuit board onto one cardboard square. It doesn’t matter which square you use, because they are all the same size. Take one square and place it on the cutting mat, with its corrugations horizontal.* Then get the circuitboard, place it on the cardboard, and use the screwdriver to poke through the four holes on the circuit board. You don’t need to poke very hard, just a small impression on the cardboard is fine. Now remove the circuit board and use the screwdriver to poke through the impressions you just made to make a hole. Be careful you don’t accidentally poke your fingers!
Once you’re finished with that, you can screw the circuit board onto the cardboard square using four short nuts and bolts provided in the small resealable bag.
* It is important that you place the square on the cutting mat with its corrugations horizontally. One of the key learning objectives of this activity is that you learn about the different corrugations of cardboard. Generally, cardboard with horizontal corrugations is stronger than vertical corrugations, because it is less likely to bend under pressure/heavy weight. Bear this in mind when you are making your robot!
The next step is to screw the motors onto cardboard. Again, place a cardboard square with the corrugations lined horizontally on the cutting mat. Remember that with the corrugations this way, the cardboard is much stronger. Take one motor, place it horizontally on the cardboard with the wires sticking out on the left, and press it firmly onto the cardboard to make an impression. Then, take the craft knife and cut a small square around the impression you made. Place the motor back on the cardboard and use the screwdriver to poke through the holes on the motor and through the cardboard.
For the second motor, you will follow similar steps but there is one important difference, so pay close attention. Take the other piece of cardboard and place it with the corrugations lined horizontally on the cutting mat. Take the motor and place it horizontally on the cardboard but with the wires sticking out on the right. From this point on, repeat the same steps: press the motor onto the cardboard firmly to make an impression, and use the craft knife to cut out a small square around it. Then, place the motor back on the cardboard and use the screwdriver to poke through the holes on the motor and through the cardboard.
This section of the video shows how to do these steps:
Step 3: Making the 90° joint (20 min)
Materials:
2 squares of cardboard you cut in Step 4
Glue gun
Craft knife
Cutting mat
Ruler
It’s time to attach the cardboard squares together, but we are going to show you a clever technique to do this, where you will cut away thin strips of the cardboard edges. For this, we are going to have a closer look at the structure of the cardboard. If you look at the sides, you can see that the cardboard has several layers, and in the middle there is a wavy part sandwiched between two layers of cardboard. The wavy part makes up the corrugation and is what makes the cardboard stronger. In this step, we are going to cut away the upper smooth layer and the wavy part, but we will be leaving the bottom layer intact.
Take the cardboard square with the circuit board attached to it and place it on the cutting mat. Now take the motor square you cut in Step 4 with the two holes and square hole facing the right side. This way, the corrugations are lined horizontally. If you place the circuit board square perpendicular to the edge of the other square, the corrugations should be flowing into each other. *
* This is another pro tip: when the ends of the corrugations flow in the same way, it will produce a much stronger structure. This way, the glue will also get down into each of the corrugations, and, as a result, bind much better.
Flip the motor square over so you have the rough side up, and keep the two holes and square hole facing the right side. Now take your ruler and place it on top of the other cardboard piece, against the edge circuit board square, so the ruler is the thickness of the cardboard away from the edge. Make sure you keep the ruler still, because this is where you will be cutting in a bit. Get your craft knife, and gently cut through the upper layer of the cardboard. Again, make multiple passes and avoid pushing the knife in too hard, so the bottom layer will remain intact.
If you do this step correctly, you will be able to peel off the upper layer and most of the corrugations, but don’t worry if that didn’t happen the first time. You can just use your nails to pull off any remaining corrugations.
Now get your glue gun and apply glue alongside the edge, then press the circuit board square firmly onto it. Make sure the glue has completely dried before you let go.
Repeat the same step for the second motor square, but make the cut on the left side.
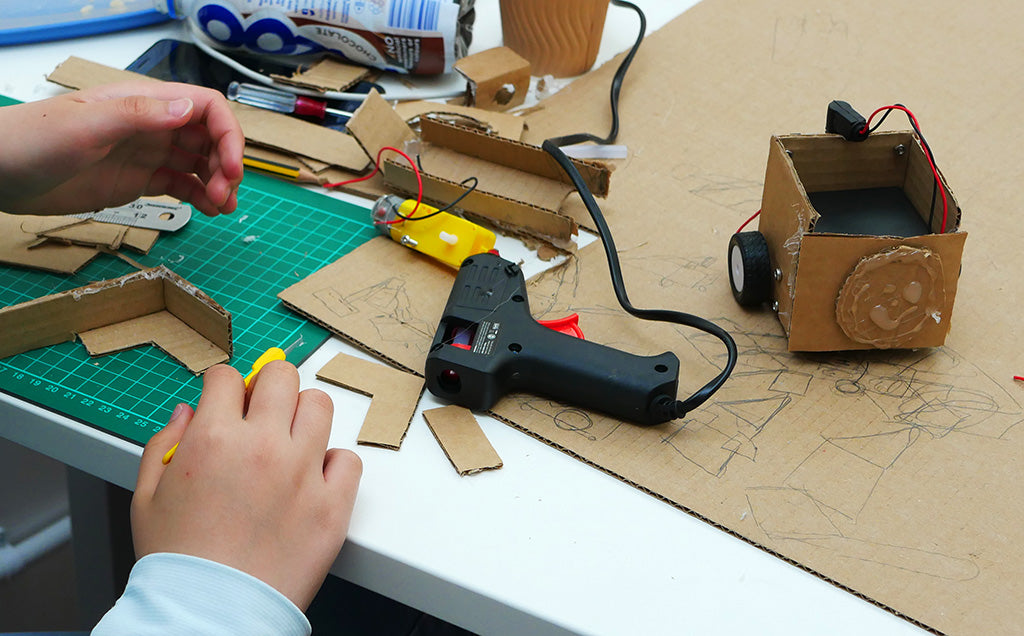
After you have glued the second motor square together with the circuit board, we are going to make the back of the robot. Get another cardboard square, place it on the cutting mat with the corrugations lined horizontally, and repeat the same edge cutting technique on both sides of the square. Then, apply glue alongside both edges, and press the 3-sided robot structure firmly onto it. We now have a four-sided structure, that is starting to look like a robot!
Step 4: Attaching the motors (15 min)
Materials:
Four long bolts and nuts
Screwdriver
Craft knife
We made two little holes and a bigger square hole earlier, which we will use to attach the two motors. Take one motor and place it inside the robot, in line with the holes. Use two long bolts and nuts on each motor to screw them on.
To make room for the motor wires, use the craft knife to make two notches underneath the circuit board.
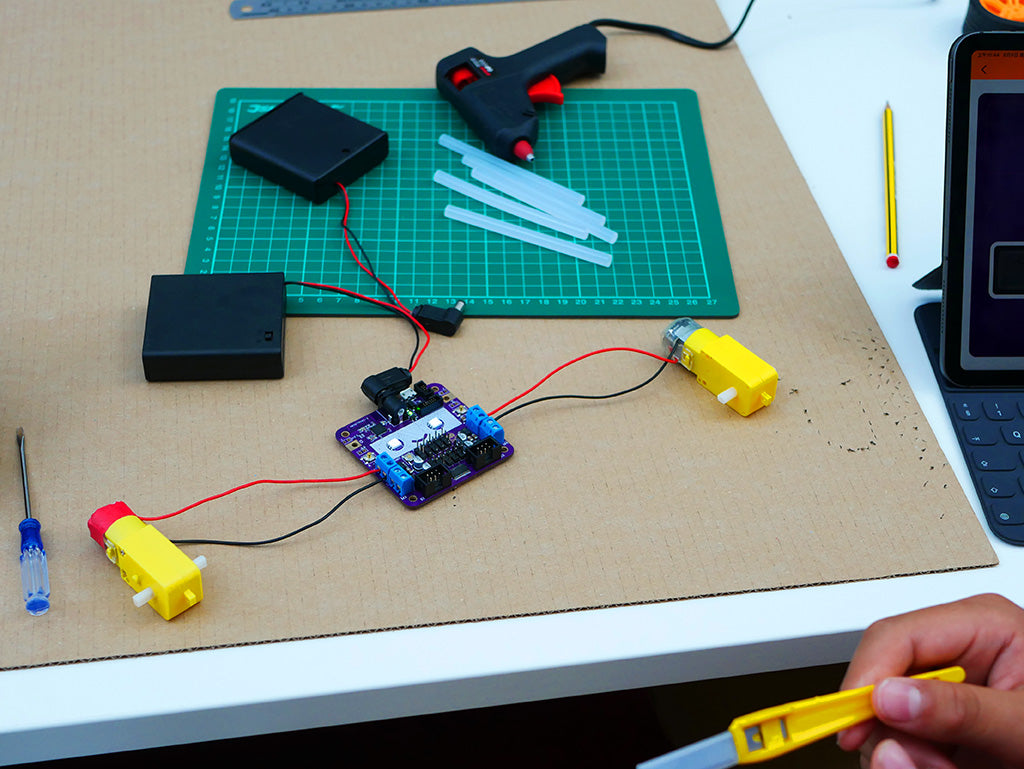
It’s time to connect the motors to the circuit board. To do this, unscrew the upper two chambers on each side of the board. Then, take the red wire of the left motor and fold it along the red wire coating, and push it inside the upper left chamber of the circuit board. After that, take the black wire of the left motor, fold it in the same way, and push it inside the second-upper left chamber of the board. Use the screwdriver to screw the chambers back on, and group the two wires to go underneath the small notch you made.
Repeat the same steps for the right motor.
Step 5: Wheels and marble (15 min)
Materials:Marble
2 x Wheels
Battery box
Glue gun
Craft knife
Ruler
Cutting mat
To add the bottom piece, use another blank piece of cardboard and repeat the same cutting technique from Step 5 on all four edges. Once that’s done, apply glue on the four edges and press the bottom of the robot firmly against it. Lift it up before the glue dries to make sure everything is glued and in place.
To give your robot more stability, we are going to add a marble to the bottom of the robot. To do so, use the craft knife to cut a large X at the bottom of the robot, near the edge of the back of the robot. Take the marble and press it against the cut to make a round impression. Make sure the marble doesn’t fit through the cut, but fits quite tightly.
Get the glue gun and fill the cut with glue, and press the marble firmly in place. Be careful you don’t accidentally burn your fingers!
The robot is almost finished, the only thing missing are the battery box and wheels. You can think about whether you want big or small wheels (hint: bigger wheels will go faster, but smaller wheels are more powerful). Get the two wheels and press them onto the armature (the small white piece sticking out of the motor that rotates). Now place the battery box inside the robot and connect it to the circuit board.
With your robot complete and powered up, open up the Smartibot app on your Smartphone and have a test drive.
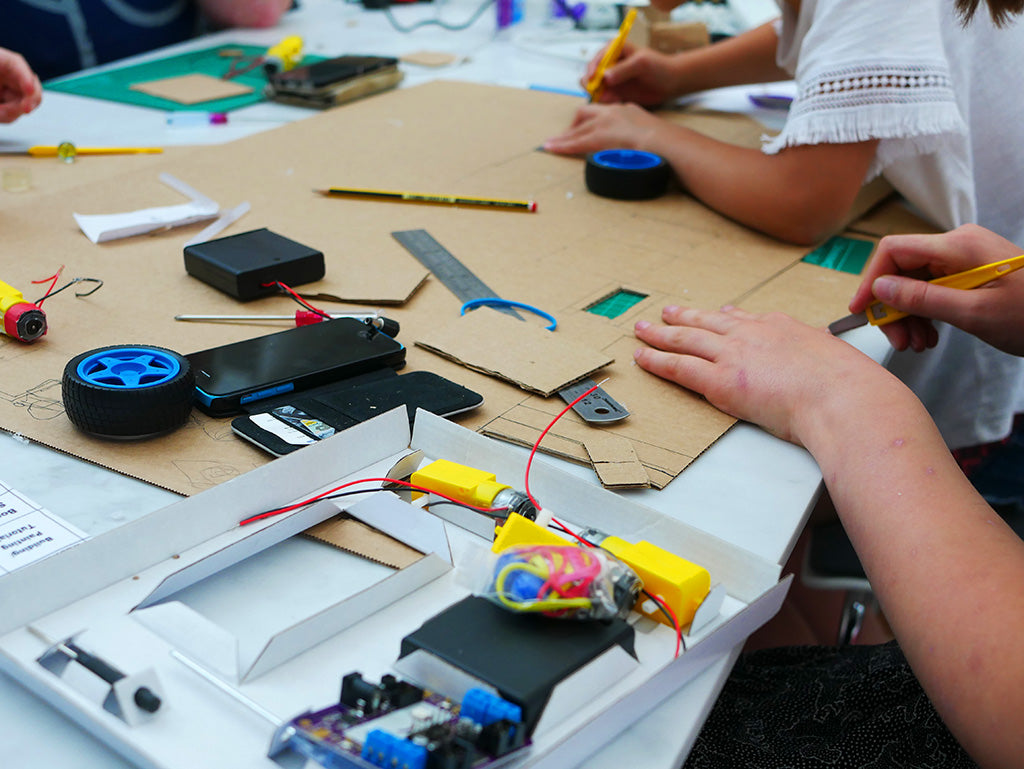
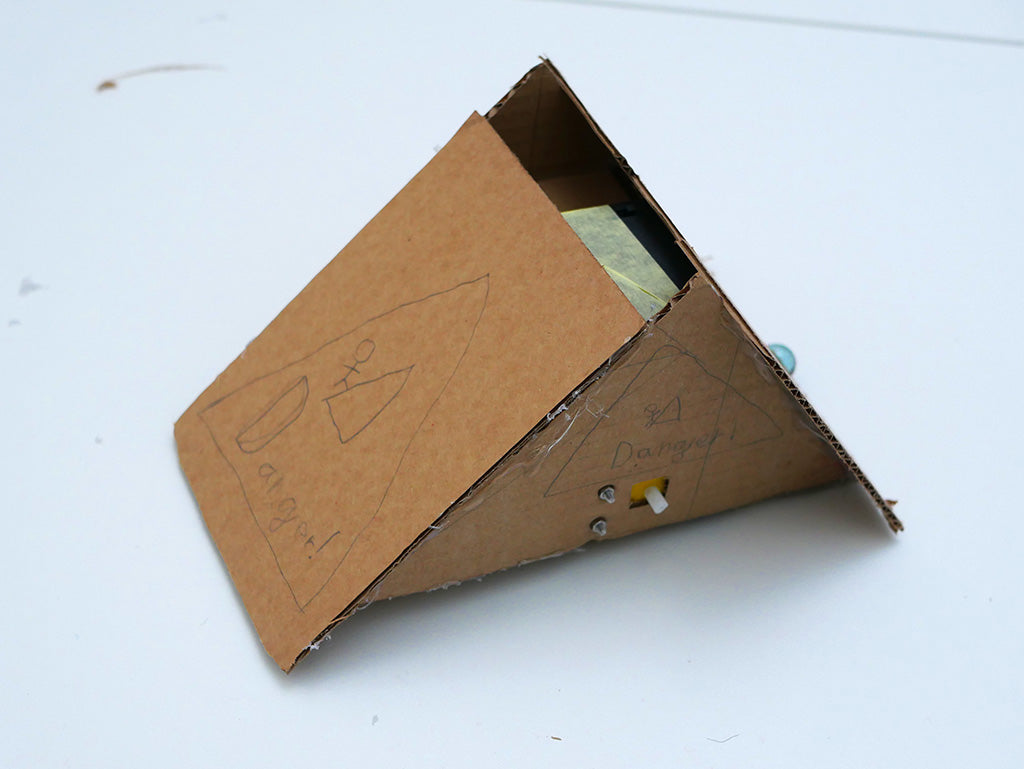
Step 6: Build your own design
Now it is time to get creative and build your own robot design. You can use the chassis base you have just made and add on extra parts like wheel covers, rams and wedges, or even add extra motors to actuate moving weapons like flippers;
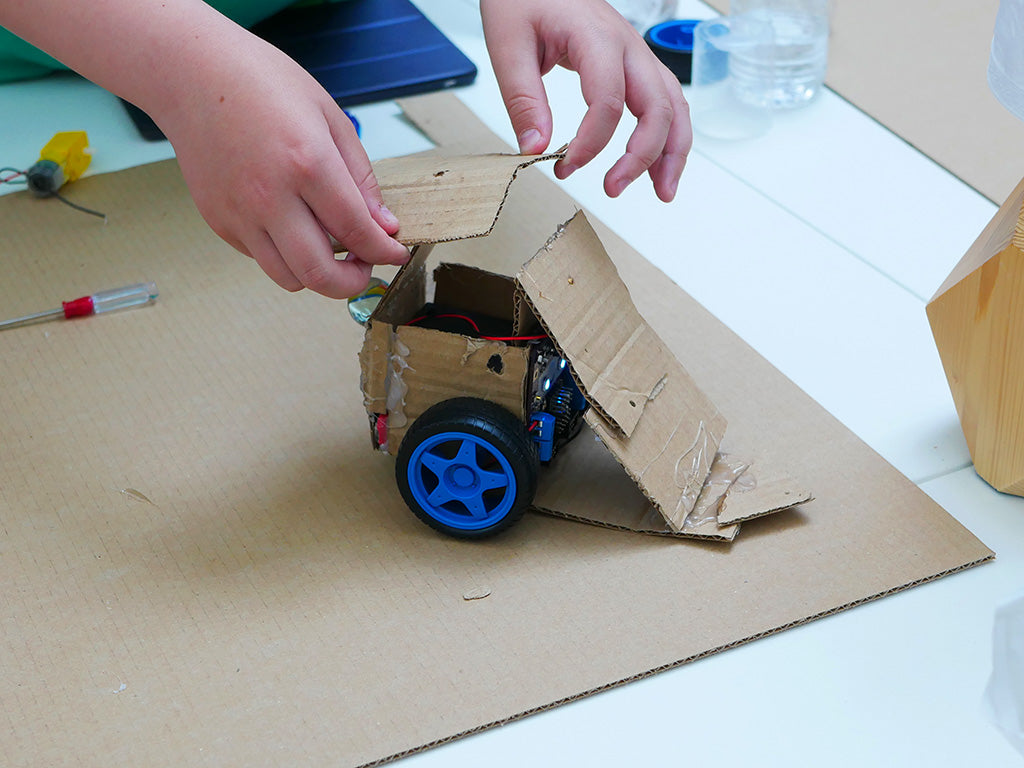
or you can start your own design from scratch.
Pro tip: when making your own robot, think about the weight distribution. The battery box is probably the heaviest part so you probably want to try and put it as low as possible, to make your robot harder to tip over, but also to have as much as possible of the weight over the wheels which will maximise your robot’s traction (and so its pushing power) and minimises friction caused by the marble. The best way to understand this is to try different positions, test out your robot and see which works best.
Step 7: The challenge
Once all the robots are complete it is time for the challenge. Tape out a square of about 100 cm to 150 cm on the floor, with another piece of tape running from the middle one side of the square away from the centre. This this will serve as both the race track (drive around the square, with the extra piece of tape marking the start/finish line) and the arena for the battle.
Line up all the robots behind the start/finish line, count down to the start, and they are off. The first robot to cross the start/finish line after three laps around the square is the winner. To prevent cheating the referee should pick up any robot that drives inside the square for a five second time penalty before placing it back down on the track.
Once the race is over give everyone five minutes to make any necessary repairs to robots before the arena battle. This takes place inside the square. Place all robots just inside the edges, facing in. Count down again to the start. This time it is all about staying inside the square with any robot that crosses over the line (just like in tennis on the line is OK, over the line is not) getting knocked out, with the last robot in the square the winner.
Step 8: Let us know how it went
Have fun and send please us pictures (or videos) of your robots to hello [at] thecraftyrobot.net or share them on Twitter, Instagram or Facebook. It would be great to know how you got on with the activity and what other resources we could create to make using Smartibots in education easier.
Thanks for reading!